Wall Framing - Custom Matts and Thin Black Frames
This is an account of our first framing experience along with tricks on how to save and get the custom look you want for less! First, we looked through pinterest to get some inspiration. We quickly decided that we loved the look of a thin black metal frame. We also wanted classic black and white photos to contrast the white mat in the frame - BUT NOT CENTERED. Here’s the process you should follow to customize your framing endeavours.


STEP 1: THE VISION
First you need to have a clear vision for what you want (design wise). Picture it (pun intended). Use Pinterest and Instagram and save a few photos of your favorite styles before you go on the hunt. You might have to compromise on a few things (for example, we couldn’t find a metal frame that was exactly as thin as we wanted but it still looks great!). Here’s our mood-board:

studio McGee


https://www.artifactuprising.com/frames/gallery-frames
STEP 2: EDIT PHOTOS
Use your favorite editing app (we used VSCO) to filter your photos the way you want. Make sure you have high quality photos if you’re printing large. We wanted ours black and white. In VSCO you can copy and paste edits so the pictures have a consistent look. However, you’ll still need to make sure that look similar (lighting, brightness, contrast) side by side since that’s how they will hang on the wall. The last thing you want is to print them and hang them and then realize the filters are different.
STEP 3: FRAME / PHOTO SIZE
Measure the space, decide how many frames and what size you want. We wanted large frames, and smallish photos (more white space around the photos). Turns out this is not something standard (it’s custom) and most places like Ikea don’t sell frames with matts to accommodate this. Print two sizes of each photo just in case one ends up looking better. We printed ours at Costco photo center and they turned out great. We chose a glossy finish, but we are definitely going to see what the matte finish looks like next time around.
Photo size: We ended up using the smaller 8 by 10 size but we printed two sizes
8 by 10 inches = $1.49 each
11 by 14 inches= $4.99 each

STEP 4: FRAME IT
This is the hardest part. Finding a frame that satisfied your vision. We got our at Ikea - it was the Ribba.
Check the following places for the right style in a range of prices.
However, none of these have the matting that we needed to be able to place our photo in the unique way we wanted. Our work around to this dilemma was to buy a white poster board, cut it out with an exacto knife to be the exact size of our frame, and then use double sided tape to place our photo wherever we wanted within the frame. Voila! Custom framing! The results came out exactly as we wanted! So pleased.
For next time, we might want to splurge on a frame with better quality glass. Ikea frames only have a plastic protection which is quite reflective and cheap looking. All in all though, this is a super easy project with expensive looking results!

Framebridge: One Stop Shop For Framing
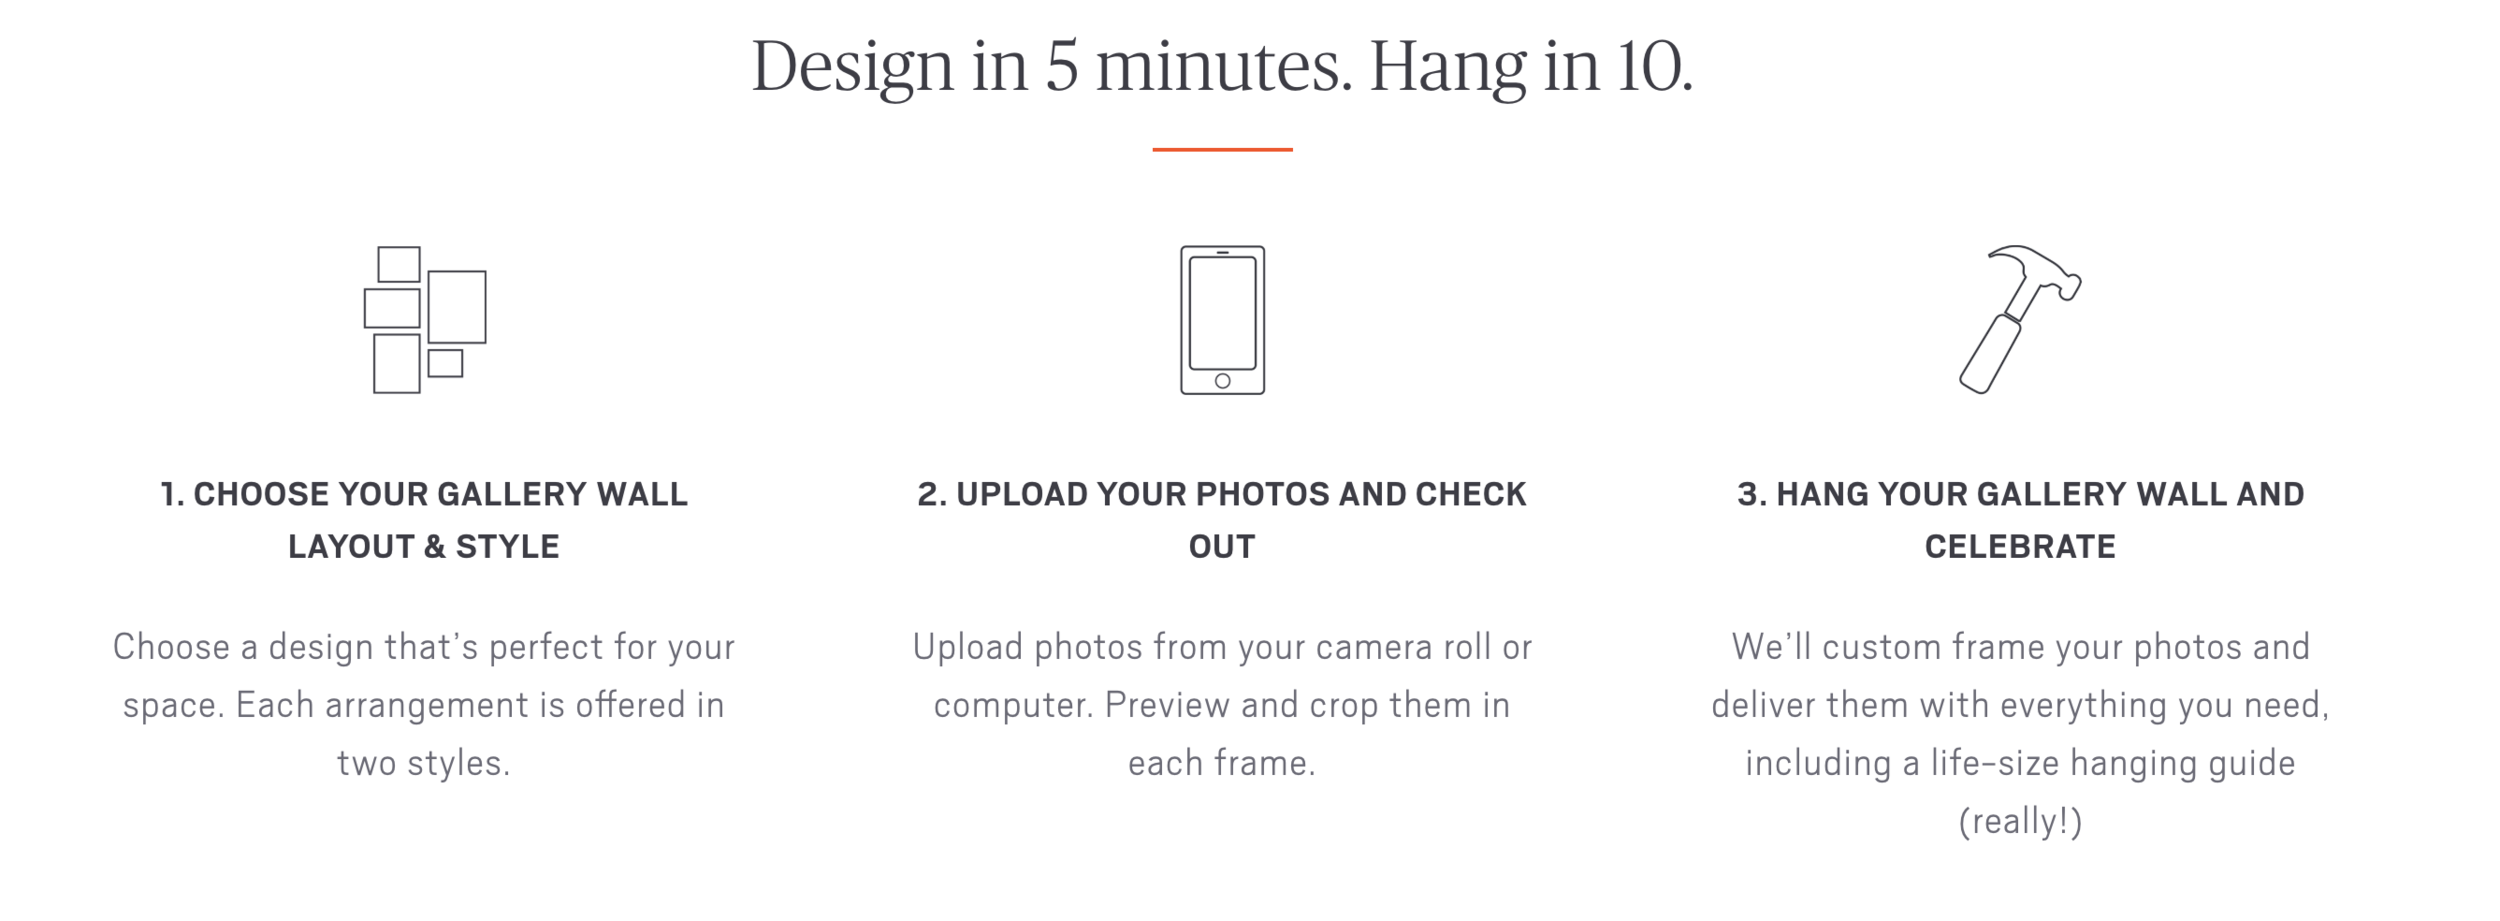
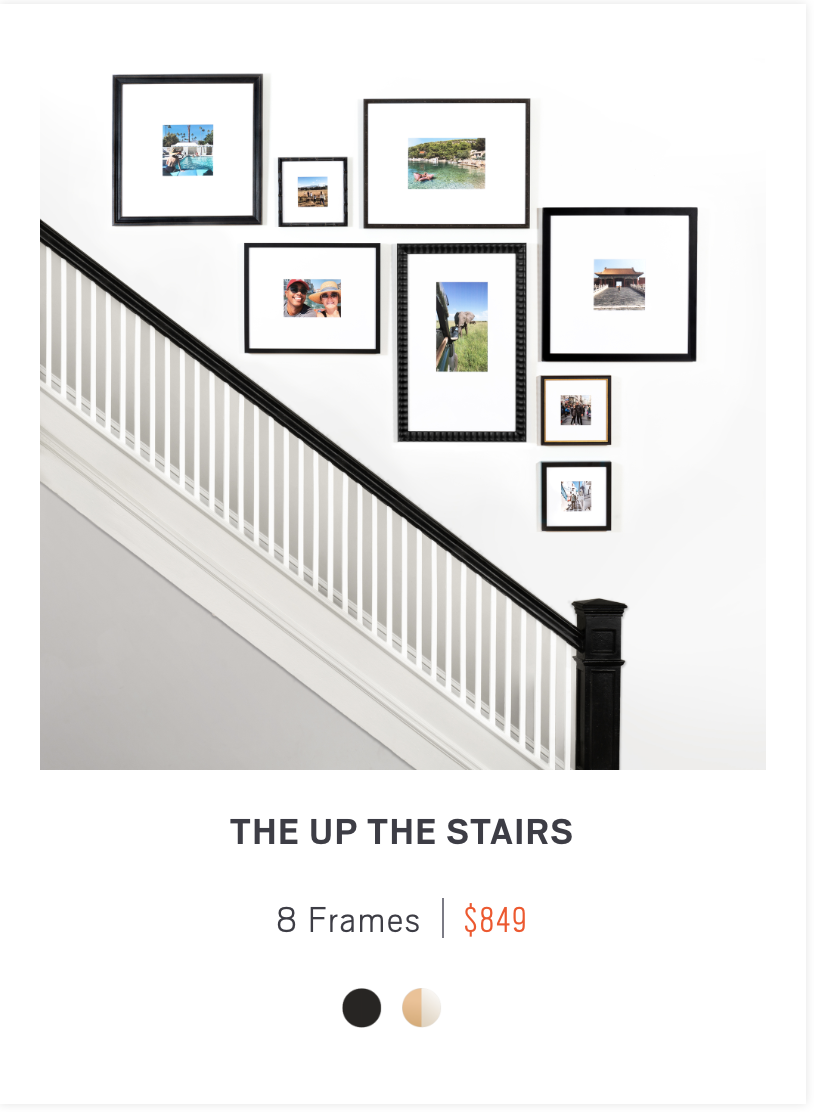
If you don’t have time and you have a bit more to spend Framebridge is a fantastic option. It is still less expensive than getting things custom framed. Along the way of trying to figure out how to get the look we wanted, we did find a pricer option that was really interesting. It’s called Framebridge and it’s a really great mid-range alternative and fantastic service! It solves exactly the issue that we were having which is that custom frames are super expensive and complicated to put together. This is a one stop shop for framing. You just choose what you want it to look like and upload your photos (or ship them in) and they send it back to you ready to mount. You can even choose a whole wall design like these: